How to Choose a PC Case for Your Build: Steps & Checklist
Case & Components
There’s a bewildering amount of PC cases available today. The market offers a multitude of colors and styles in various form factors. This article is intended to help you unpick the jargon and confidently select a PC case with a sweet spot balance of visual appeal and capabilities and the all-important compatibility with the PC components you have in mind. If you want to get up to speed regarding the main purposes of a PC case and the terminology commonly used, please check our guide to What is a PC Case first, and then come back here.
To choose the right PC case, first confirm its motherboard support, component clearance, cooling compatibility, and airflow characteristics. Then compare the front I/O, practical build features, and its visual design.
Step 1: What Motherboard Form Factor Are You Using?
The motherboard is the foundational choice upon which you will build the rest of your PC. There are four common motherboard form factors, which are (from largest to smallest) dubbed E-ATX, ATX, Micro-ATX, and Mini-ITX. Larger boards can offer greater room for expansion, ports (I/O), and slots, while smaller form factors will usually be a better fit when space is a priority. We’d also like to point out that E-ATX isn’t a very tightly standardized form factor. Thus, ensuring E-ATX motherboard compatibility also requires checking the motherboard’s actual dimensions against the case’s supported dimensions. As an example, for the MEG MAESTRO 900R case, the published compatibility limit is 280 × 305 mm.
Motherboard form factor
Motherboard form factor
Typical case size to consider
Compatible MSI case example
Smaller motherboards can generally fit in a larger case if the case specifications explicitly list support for that form factor. Always make sure the PC case specifications explicitly confirm that your chosen motherboard form factor is compatible.
Step 2: Will Your GPU and Other Components Fit?
Now we have narrowed down our case selection criteria to ensure our motherboard fits in comfortably; we’ll go through a similar process for our graphics card, CPU cooler, power supply, and any extra fans and radiators we plan to use in the PC build.
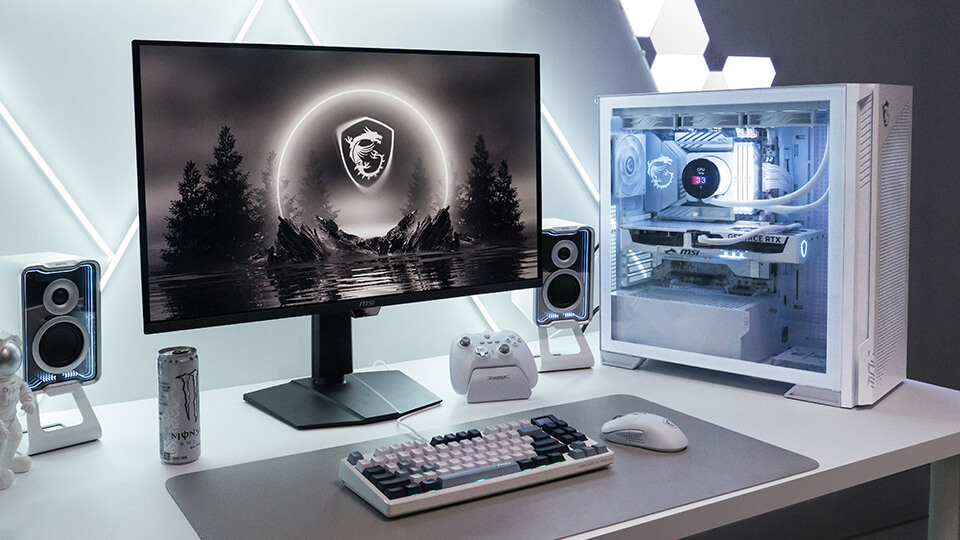
If you’d like some Lucky the Dragon AI help, our MSI EZ PC Builder can understand your PC needs to create a complete new PC build. Lucky can also check component compatibility, or even offer compatible upgrade suggestions.
Check GPU Clearance
The latest generation graphics cards are bigger than ever. So, it is more important than ever to check the case’s maximum supported GPU length and make sure it has enough expansion slots to accommodate your graphics card’s thickness. Also check the power-connector orientation and cable-routing path to avoid interference with the side panel.
Please be aware that some cases will require adjustments to fan positioning, drive cage positioning, or other internal adjustments to free up their maximum GPU size compatibility.
Check CPU Cooler and Radiator Support
CPU air coolers can be rather tall, especially popular ‘tower’ designs, so it is important to check that your chosen CPU cooler won’t be too tall for the PC case. Cross-reference the information listed in the case and air cooler specifications.
If you are going to use an AiO liquid cooling solution on your CPU, look for radiator size compatibility measurements. You should also think about radiator mounting position and nearby component clearances.
Those who haven’t decided on whether to go for air or liquid (AiO) CPU cooling might want to reference our extensive guide to which is better for your next PC.
Check the case’s intake and exhaust locations, whether fans are included, and which fan layouts are supported. Also, look for dust filters that are easy to remove and clean.
Check PSU and Storage Space
Another major PC component that comes in various sizes is the power supply unit (PSU). Smaller cases might sometimes insist on a small form factor (SFF) PSU, such as an SFX, SFX-L, or Flex ATX model. However, most desktop tower cases will have room for an ATX PSU. This is another time to check your PC case specifications' maximum compatibility notes. Our MAG FORGE 330R AIRFLOW supports ATX PSUs up to that max 200mm length, as you can see by the linked specifications page. However, if you went for the MAG PANO 130R PZ / WHITE you would have to ensure your PSU is no more than 180mm long. Check the PSU form factor and maximum supported length. Some cases feature a dual-chamber design or wider cable-routing space for easier installation, cleaner cable management, and greater build flexibility.
If your build uses 2.5-inch SATA SSDs or 3.5-inch HDDs, check the available mounts and whether the drive cage reduces PSU or GPU clearance. This matters less for an all-M.2 storage build.
Step 3: Which Case Features Matter to You?
We are almost there, but there are a few more PC case choices to make to prioritize convenience, maintenance, upgradeability, and (at last) consider the case’s visual style
Feature
What to check
Matters most when...
Front I/O
USB types, audio, and motherboard header support
Devices need frequent front access.
Cable management
Routing space, tie points, and access panels
A clean build or easy maintenance is important.
Dust control
Filter locations and removability
The room is dusty, or the PC runs frequently.
Size and weight
External dimensions and total build weight
Desk space or transport is limited.
Visual design
Mesh, panoramic glass, lighting, or back-connect
The finished appearance is a priority.
Ensure the case front I/O panel has the connections you use most often. USB Type-A is useful for common peripherals, while USB Type-C can be worth prioritizing for fast external storage or phone connectivity. You will also want to check that the top speeds of all the front I/O are adequate.
Now for some fun! There are a lot of design choices available in 2026, so whatever compatibility constraints have affected your shortlist so far, we’re pretty sure you’ll still be able to pick from cases with mesh, panoramic glass, or back-connect style – and from various colors, and RGB lighting schemes.
Which MSI PC Case Fits Your Build?
Now that you are confident about the type, specifications, and style of the PC case you need, our shortlist of high-quality MSI cases might be useful. These are split into five main categories that we feel fit the majority of users. The table highlights a premium hardware showcase, a mainstream gaming case with a trendy panoramic case, and we have highlighted a pair of airflow-first designs for mainstream and entry-level PC DIYers. We didn’t forget to include a capable yet compact case recommendation; this one has a panoramic style. Most of these cases are available in black or white.
Build scenario
Recommended MSI case
Key Specifications
Premium Hardware Showcase
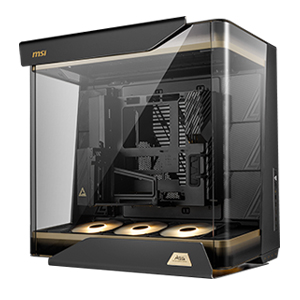
- Full tower case supports regular E-ATX, ATX, Micro-ATX, Mini-ITX motherboards
- Detachable 4-Way Rotatable Motherboard Tray
- Supports dual GPUs and vertical GPU installation with an included PCIe 5.0 riser cable
- Pre-installed with 3x 160 mm reverse-blade fans and supports up to 14x 120 mm fans or dual 420mm radiators for Extreme Cooling Performance
Airflow-first ATX gaming PC build
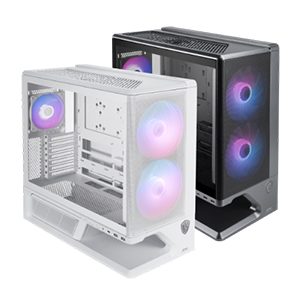
- Supports regular ATX, Micro-ATX, Mini-ITX, and Back-connect ATX and Micro-ATX motherboards
- Two-color version: black and white
- Floating base design, creating a custom space for figures
- Pre-installed 2x 160mm fans at the front
- Quick snap-and-lock PSU cover for easy assembly
Panoramic mainstream gaming PC build
- Supports regular ATX, Micro-ATX, Mini-ITX, and Back-connect ATX and Micro-ATX motherboards
- 270-degree panoramic display with tool-free tempered-glass panels
- Pre-installed 4x ARGB fans, including 3x reverse-blade side fans
- Supports up to 10x fans and 360mm radiators on the top and side
- Rotatable GPU bracket supports horizontal or vertical GPU installation (riser cable not included)
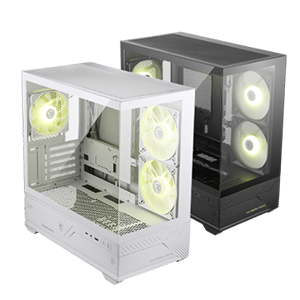
Compact Micro-ATX PC build
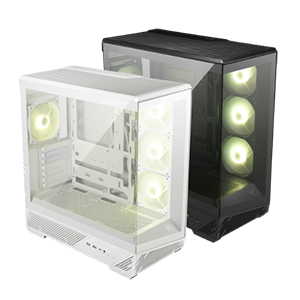
- Compact mini-tower supporting regular Micro-ATX and Mini-ITX motherboards
- 270-degree panoramic tempered-glass display
- Pre-installed 2x 140mm reverse-blade ARGB side fans and 1x 120mm ARGB rear fan
- Supports up to 9 fans and a 360mm top radiator
Airflow-first entry-level PC build
- ATX mid-tower supporting ATX, Micro-ATX, and Mini-ITX motherboards
- High-airflow front mesh panel for efficient cooling
- Pre-installed 4x ARGB fans: 3x front and 1x rear
- Supports up to 11x system fans and a 360mm top AIO liquid cooler
Conclusion: PC Case Selection Checklist
It is always a good idea to check your preparations, measurements, and calculations before going full steam ahead with any project. We’d encourage PC case buyers to recheck component fit, airflow, and practical desired features at the very least. For a more thorough PC build validation process, work through the checklist below:
- Motherboard form factor and back-connect support
- GPU length and expansion-slot requirements
- Air-cooler height or radiator size and position
- PSU length and number/type of storage devices
- Airflow and fan layout
- Front I/O and DIY-friendly features
- External dimensions
- Color, materials, style, RGB lighting considerations
To keep life simple, don’t forget to use the MSI EZ PC Builder to plan a complete parts list and check compatibility. Continue with Yes We Build, then explore Build for Glory for complete builds and further inspiration.
FAQ
Does a bigger PC case always mean better airflow?
Not always. Good airflow depends on the overall cooling design, including ventilation, fan placement, component layout, and cable management, not case size alone. A well-designed compact case can cool components more effectively than a larger case with limited airflow paths.
Can I install a Micro-ATX motherboard in an ATX case?
Usually, yes, provided the case specifications list Micro-ATX support. Always check the supported motherboard form factors before building. If you are using a back-connect motherboard, make sure the case also explicitly supports the back-connect layout.
What is Project Zero, and do I need a compatible case?
Project Zero is MSI's back-connect motherboard design, which moves connectors to the rear of the board to create a cleaner, cable-free front view. Because the connector layout differs from a standard motherboard, a Project Zero motherboard requires a case that explicitly supports back-connect motherboards.